For many PlayStation 4 enthusiasts, the default audio setup often leaves much to be desired when it comes to crystal-clear communication or professional-grade streaming. Whether you are strategizing with teammates, hosting a lively podcast, or broadcasting your gameplay to a global audience, upgrading your audio input is a game-changer. A high-quality USB microphone can dramatically improve your voice clarity, enrich your content, and immerse you deeper into the gaming experience. This comprehensive guide will navigate you through the world of PS4 USB microphones, helping you discover the perfect device to meet your needs and amplify your presence.
PS4 USB Microphones: Overview and Applications
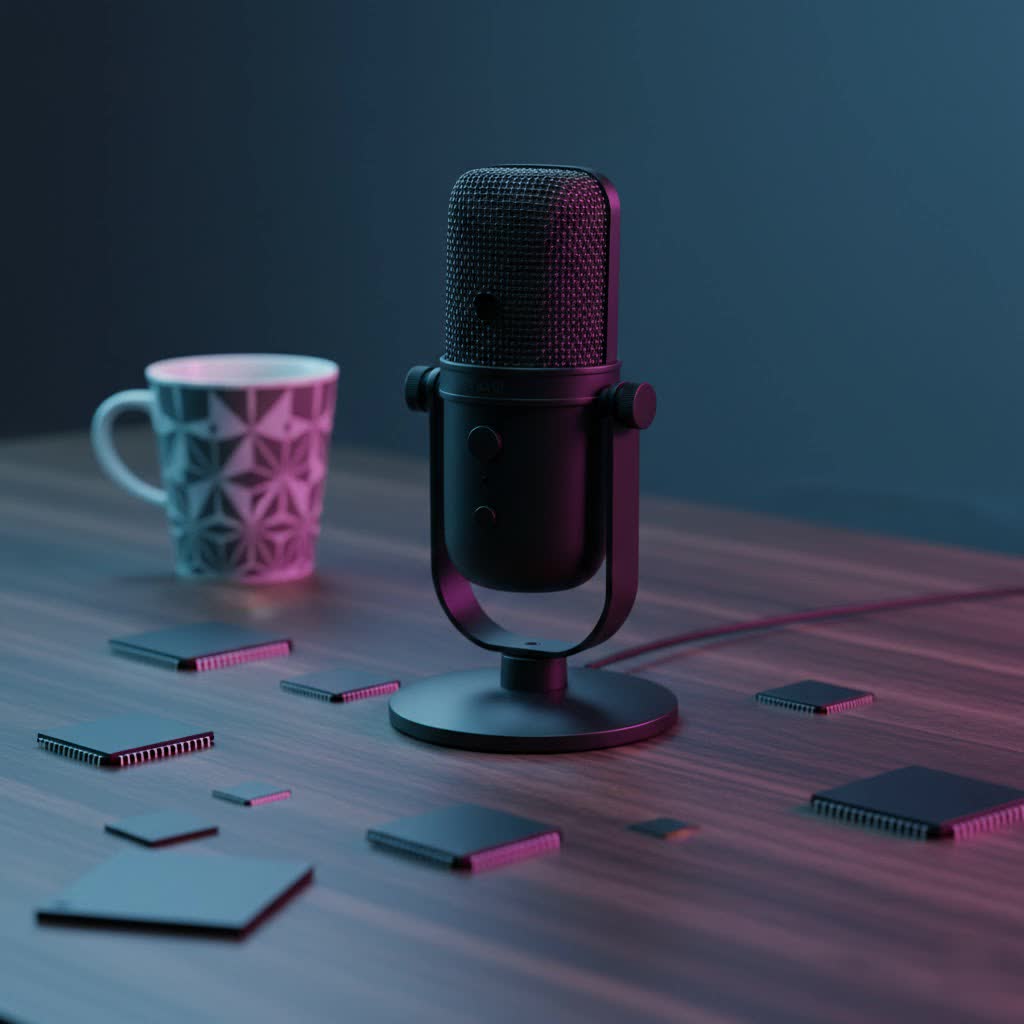
USB microphones are a popular choice for their simplicity and effectiveness, offering a significant leap in audio quality compared to standard headset microphones. Their “plug-and-play” nature makes them exceptionally user-friendly, allowing you to connect directly to your PS4 console without the need for complex audio interfaces or drivers. This convenience has made them a staple for PlayStation gamers and content creators alike.
These versatile devices serve various crucial applications within the PS4 ecosystem. For gaming chat, a dedicated USB microphone ensures your voice cuts through the in-game action, making communication with your squad clearer and more reliable. For aspiring streamers and content creators, USB microphones deliver broadcast-quality audio, which is essential for engaging an audience on platforms like Twitch or YouTube. They are also ideal for podcasting, enabling you to capture rich, nuanced vocal performances directly from your console, elevating the production value of your shows.
Types of USB Microphones
Understanding the different types of USB microphones is key to selecting the right one for your specific PS4 needs. Each type offers distinct characteristics that impact sound capture and performance.
Based on Design
- Condenser Microphones: These microphones are known for their sensitivity and ability to capture a wide frequency range with great detail. They are excellent for picking up subtle nuances in vocals and are often favored in studio environments for their crisp, clear sound. However, their high sensitivity means they can also pick up significant background noise, making them more suitable for quieter spaces.
- Dynamic Microphones: Less sensitive than condenser mics, dynamic microphones are more robust and excel at capturing direct sound sources while rejecting ambient noise. This makes them an ideal choice for louder environments, such as a busy gaming room, where you want to focus solely on your voice without picking up keyboard clicks or room echoes.
|
Our Picks for the Best USB Microphone in 2026
As an Amazon Associate I earn from qualifying purchases.
|
||
| Num | Product | Action |
|---|---|---|
| 1 | Shure MV7+ Podcast Dynamic Microphone – OBS Certified, Enhanced Audio, LED Panel, USB-C & XLR Outputs, Auto Level Mode, Digital Pop Filter, Reverb Effects – For Podcasting, Streaming, Recording, Black |

|
| 2 | P PUPGSIS XLR/USB Podcast Microphone, Gaming Mic with Mute Button, Reverb Effects, Noise Cancellation, Boom Arm Stand, Headphones Jack, Dynamic Microphone for Streaming/Recording/Gaming/Vocal-Black |
|
| 3 | FIFINE USB Microphone, Metal Condenser Recording Microphone for MAC OS, Windows, Cardioid Laptop Mic for Recording Vocals, Voice Overs, Streaming, Meeting and YouTube Videos-K669B |
|
| 4 | ZealSound Podcast USB Microphone for PC/Mac/iPhone, Cardioid Condenser Mic with Noise Reduction, Tap-to-Mute, RGB Lighting, Zero Latency Monitoring, Volume Control for Gaming, Recording, YouTube |
|
| 5 | Amazon Basics USB Condenser Microphone for Streaming, Recording, and Podcasting on PC, Plug and Play, Cardioid Pickup, Adjustable Stand with 360° Rotation, 5.8 x 3.4 inches, Black |
|
| 6 | FIFINE USB/XLR Dynamic Microphone for Podcast Recording, PC Computer Gaming Streaming Mic with RGB Light, Mute Button, Headphones Jack, Desktop Stand, Vocal Mic for Singing YouTube-AmpliGame AM8 |
|
| 7 | DUNGZDUZ USB Microphone for Laptop and Desktop Computer, High Sensitivity for Clear Call, Plug-and-Play, High Gain, Cordless Mini-Sized Portable, Ideal for Work & Study |
|
| 8 | Logitech Creators Blue Yeti USB Microphone for Gaming, Streaming, Podcast, YouTube, Discord, PC, Studio Sound, Plug & Play-Blackout |
|
| 9 | Dynamic Microphone, USB-C/XLR Podcast Recording PC Microphone for Podcast Recording Streaming Gaming with RGB Light, Mute Button, Desktop Stand, Headphones Jack, Vocal Mic for Singing Tiktok YouTube |
|
| 10 | JOUNIVO USB Microphone, 360 Degree Adjustable Gooseneck Design, Mute Button & LED Indicator, Noise-Canceling Technology, Plug & Play, Compatible with Windows & MacOS |
|
Based on Polar Pattern (Pickup Pattern)
The polar pattern describes the direction from which a microphone picks up sound.
- Cardioid: This is the most common pattern for gaming and streaming. Cardioid microphones primarily pick up sound from the front, rejecting sound from the sides and rear. This helps isolate your voice and minimize unwanted background noise, making it perfect for single-person setups.
- Omnidirectional: Omnidirectional microphones pick up sound equally from all directions. While less common for individual gaming, they are useful for capturing group discussions, such as during a local co-op stream or a multi-person podcast around a single mic.
- Bidirectional (Figure-8): These microphones pick up sound from the front and back equally, while rejecting sound from the sides. They are often used for interviews with two people sitting opposite each other.
Based on Additional Features
While most USB microphones integrate a basic sound card for digital conversion, variations exist based on included functionalities.
- Microphones with Integrated Sound Cards: The vast majority of USB microphones fall into this category. They convert analog sound to digital internally, sending a digital signal directly to your PS4. This simplifies your setup, as you don’t need external audio interfaces.
- Microphones Without Dedicated Sound Cards (XLR with USB Interface): While not strictly “USB microphones” in the traditional sense, some professional XLR microphones can be used with a PS4 via a USB audio interface or mixer. These setups offer more flexibility and higher-fidelity audio control but require additional hardware and a more complex configuration, typically beyond the simple plug-and-play experience of a direct USB mic. For the purpose of this guide, we focus on direct USB connectivity.
Key Factors When Choosing a PS4 USB Microphone
Selecting the right USB microphone for your PS4 involves considering several technical specifications and practical features to ensure it aligns with your specific use case.
Sound Quality
The cornerstone of any good microphone is its sound quality. Key metrics include:
- Sensitivity: This refers to how well a microphone converts acoustic energy into an electrical signal. A more sensitive microphone can pick up quieter sounds, but in a noisy environment, it might also capture unwanted ambient noise.
- Frequency Response: This indicates the range of frequencies a microphone can accurately capture. A broad and flat frequency response generally means more natural and accurate sound reproduction, crucial for rich vocal tones.
- Self-noise: All electronic devices produce a small amount of internal noise. A lower self-noise rating means a cleaner, clearer audio signal, especially important for sensitive condenser microphones.
Durability and Design
A microphone’s physical attributes contribute to its longevity and usability.
- Materials: Look for microphones built with sturdy materials like metal for better durability against accidental bumps or drops.
- Form Factor: USB microphones come in various designs, from compact desktop mics to larger models designed for boom arms. Consider your space and how you intend to position the microphone.
- Portability: If you plan to move your setup frequently, a more compact and lightweight microphone might be preferable.
Additional Features
Modern USB microphones often come equipped with extra features that enhance their functionality and user experience.
- Gain Control: An on-board gain knob allows you to adjust the microphone’s input sensitivity directly, making it easy to fine-tune your volume without diving into PS4 settings.
- Headphone Jack for Monitoring: A crucial feature for streamers and gamers, a 3.5mm headphone jack on the microphone itself enables zero-latency monitoring. This means you hear your own voice exactly as the microphone picks it up, allowing for real-time adjustments to your speaking volume and distance.
- Quick Mute Button: An easily accessible mute button can instantly cut your audio, preventing accidental broadcasts of private conversations or sudden loud noises.
- Built-in Pop Filter and Shock Mount: These accessories help improve audio quality by reducing plosive sounds (like “p” and “b”) and minimizing vibrations from your desk or stand.
Popular PS4 USB Microphones Compared
Many excellent USB microphones are compatible with the PS4. Here’s a comparison of some highly-rated models popular among gamers and streamers:
| Product Name | Type | Polar Pattern(s) | Frequency Response | Key Features | Pros | Cons | Price Range (USD) |
|---|---|---|---|---|---|---|---|
| Blue Yeti | Condenser | Cardioid, Omni, Bi, Stereo | 20Hz-20kHz | Multiple patterns, gain control, headphone jack. | Versatile, excellent sound, popular for streaming. | Can be sensitive to background noise. | $100 – $130 |
| HyperX QuadCast S | Condenser | Cardioid, Omni, Bi, Stereo | 20Hz-20kHz | Customizable RGB, touch-to-mute, built-in shock mount. | Gamer-focused aesthetics, great features for streamers. | RGB not essential for everyone. | $130 – $160 |
| Rode NT-USB+ | Condenser | Cardioid | 20Hz-20kHz | Broadcast-quality sound, USB-C, zero-latency monitoring. | Professional sound, sturdy build, simple setup. | No on-mic gain control, no integrated stand. | $170 – $200 |
| Shure MV6 | Condenser | Cardioid, Omnidirectional | 20Hz-20kHz | Compact desktop design, app control, great noise reduction. | Excellent sound from distance, highly portable. | App control not available on PS4 directly. | $120 – $150 |
| Shure MV7+ | Hybrid (USB/XLR) | Cardioid | 50Hz-16kHz | Dual USB-C/XLR, touch panel, voice isolation, auto-level. | Professional-grade sound, adaptable for future upgrades. | More expensive, might be overkill for basic gaming. | $250 – $280 |
| Samson G-Track Pro | Condenser | Cardioid, Omnidirectional | 50Hz-20kHz | Instrument input, direct monitor, volume controls. | All-in-one solution for musicians and gamers. | Larger footprint. | $130 – $150 |
| Fifine AmpliGame AM8 | Dynamic | Cardioid | 50Hz-15kHz | XLR/USB-C, RGB, headphone jack, mute button. | Excellent budget option, good for noisy environments. | Sound quality slightly less refined than high-end mics. | $50 – $70 |
How to Set Up Your USB Microphone on PS4
Connecting and configuring a USB microphone on your PS4 is a straightforward process, but understanding the steps ensures optimal performance.
Determine Your Usage Needs
Before diving into settings, clarify your primary purpose:
- Purpose: Are you mainly using it for casual voice chat, serious competitive gaming, or high-quality streaming/recording?
- Environment: Is your gaming space quiet, or do you have significant background noise (e.g., fans, keyboard, other people)?
- Budget: How much are you willing to invest in an audio upgrade?
Step-by-Step Connection and Configuration
- Plug in the Microphone: Connect your USB microphone directly into one of the available USB ports on the front of your PS4 console.
- Access PS4 Settings: From the PS4 home screen, navigate up to the toolbar and select “Settings.”
- Go to Devices: Scroll down and select “Devices” from the Settings menu.
- Select Audio Devices: Choose “Audio Devices.”
- Set Input Device: Your PS4 should detect the newly plugged-in USB microphone. Under “Input Device,” select your USB microphone (it might appear as “USB Headset” or its specific product name).
- Adjust Microphone Level: Select “Adjust Microphone Level.” Speak into the microphone and adjust the slider until the indicator is in the “Good” range. This prevents your voice from being too quiet or too loud (clipping).
- Set Output Device (Optional but Recommended): If your USB microphone has a headphone jack for zero-latency monitoring, you might be able to select it as the “Output Device” to hear both your voice and game audio. Alternatively, you can typically keep your output device set to your headphones connected to the controller or your TV/sound system for game audio, with the USB mic solely handling input.
- Broadcasting Settings (for Streamers): If you plan to stream, navigate back to the main Settings menu, then to “Sharing and Broadcasts.” Go to “Broadcast Settings” and ensure “Include Microphone Audio in Broadcasts” is checked. You may also need to adjust your mic volume specifically for broadcasts.
It is common for the PS4 to identify a standalone USB microphone as a “USB Headset.” If you encounter issues where your microphone is recognized, but you can’t hear game audio through your regular headphones, ensure your “Output Device” is correctly set to your preferred audio output (e.g., headphones connected to your controller or TV).
Top USB Microphone Brands for PS4
The market for USB microphones is robust, with several brands consistently delivering quality and innovation.
- Rode: A highly respected name in professional audio, Rode offers USB microphones known for their exceptional sound fidelity and robust build, like the NT-USB+.
- Blue (now part of Logitech G): Famous for their Blue Yeti and Blue Snowball microphones, this brand is synonymous with accessible, high-quality USB audio for streamers and podcasters.
- Audio-Technica: Another industry veteran, Audio-Technica produces reliable microphones, including USB models that provide clear, consistent audio performance.
- HyperX: A prominent gaming peripheral brand, HyperX offers microphones like the QuadCast series, designed with gamers and streamers in mind, featuring intuitive controls and eye-catching aesthetics.
- Samson: Samson provides a range of USB microphones, such as the G-Track Pro and Meteor Mic, offering good value and versatility for various applications.
- Shure: A legendary name in microphones, Shure has entered the USB market with models like the MV6 and MV7+, bringing their professional audio heritage to consumer-friendly devices.
- Fifine: Known for offering excellent performance at budget-friendly prices, Fifine mics like the AmpliGame AM8 are popular choices for gamers seeking a cost-effective upgrade.
> “Choosing the right USB microphone for your PS4 is about balancing raw audio quality with practical features and your specific environment. Don’t underestimate the impact of a clear voice on your gaming and streaming experience.” – Tech Audio Pro, Lead Engineer, SoundTech Solutions
Conclusion
Upgrading to a dedicated USB microphone for your PlayStation 4 is one of the most impactful improvements you can make to your gaming, streaming, or content creation setup. From enhancing team communication to delivering professional-grade audio for your audience, the right microphone unlocks a new level of engagement. By considering factors like microphone type, sound quality, durability, and essential features, you can confidently choose a device that perfectly suits your needs and budget. Remember to follow the simple setup steps to integrate your new microphone seamlessly into your PS4 system. Elevate your voice, enhance your presence, and truly be heard with a top-tier PS4 USB microphone.
What kind of adventures will your improved audio take you on next?
Frequently Asked Questions
Why isn’t my PS4 recognizing my USB microphone?
First, ensure the microphone is fully plugged into a working USB port on your PS4. Then, navigate to PS4 “Settings” > “Devices” > “Audio Devices” and check if the microphone appears as an “Input Device.” If not, try restarting your PS4 or plugging the mic in after you’ve signed into your PS4 account. Some older or less common microphones might also have limited compatibility.
Can I use any USB microphone with my PS4?
While many “class-compliant” USB microphones (those that don’t require special drivers) are plug-and-play compatible with the PS4, it’s not guaranteed that every USB microphone will work perfectly. Popular brands like Blue, HyperX, Rode, and Shure generally offer excellent compatibility. Always check product specifications or user reviews for PS4 compatibility before purchasing.
How do I hear game audio and use my USB mic simultaneously on PS4?
If your USB microphone has a 3.5mm headphone jack, you can plug your headphones directly into the mic for zero-latency monitoring, which often carries game audio as well. If not, go to PS4 “Settings” > “Devices” > “Audio Devices,” set your USB mic as the “Input Device,” and ensure your preferred headphones (connected to your controller) or TV are selected as the “Output Device.”
What is microphone gain, and how do I adjust it on PS4?
Microphone gain controls the sensitivity of your microphone, determining how loud your voice sounds before it even reaches the PS4. You can adjust the gain on your PS4 by going to “Settings” > “Devices” > “Audio Devices” and selecting “Adjust Microphone Level.” Speak into the mic and use the slider until the audio indicator shows your voice is in the “Good” range. Some microphones also have a physical gain knob for on-device adjustment.